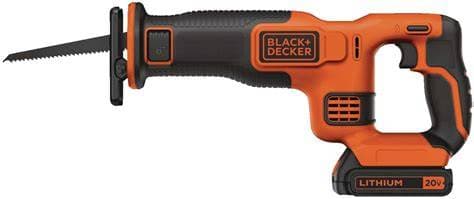

BLACK+DECKER BDCR20C Reparationsmanual
Omfattande reparationsguide för BLACK+DECKER BDCR20C 20V MAX pendelsåg. Inkluderar felsökning, delaridentifiering, säkerhetsråd och gör-det-själv reparationssteg för 16 vanliga feltyper.
$39.99
Senast uppdaterad Jul 31, 2026, 11:06 AM
Manual information
Om den här manualen
Omfattande reparationsguide för BLACK+DECKER BDCR20C 20V MAX pendelsåg. Inkluderar felsökning, delaridentifiering, säkerhetsråd och gör-det-själv reparationssteg för 16 vanliga feltyper.
0% Reported Successful Repair
$39.99
Fullständig manual inkluderar
- root cause analysis
- tools needed
- step-by-step repair procedure
- diagrams
- exploded views
- post-repair checks
Förhandsgranskning av innehållsförteckning
- BLACK+DECKER BDCR20C 20V MAX* STICKSÅG
- Black+decker Bdcr20c
- De sex viktigaste sakerna
- Vad denna modell faktiskt har
- Indikator- och signalöversikt
- Modellrevisionsvarning
- Kraft- och skärväg
- Normal användningssekvens
- Normalt beteende som kan likna fel
- Vad denna modell inte har
- Säkert
- Pivotera
- Strukturell fara
- FM-04, FM-15, FM-16.
- Fm-13.
This preview shows only a portion of the complete repair manual. Purchase to access the full repair documentation, downloadable PDF and detailed repair procedures.
Troliga grundorsaker
- Battery is empty, protected, or faulty
- Pack is not latched or contacts are dirty
- Lock-off or trigger travel is incomplete
- Switch, wiring, or motor has failed
- Gear or reciprocating drive is seized
- Battery rails or socket contain debris
- Pack shell, rails, or handle is distorted
- Release button or latch is jammed
- Wrong or unverified battery is used
- Contact plate or housing is damaged
- Outlet has no power or is switched off
- Pack is not fully seated in charger
- Pack is too hot or too cold to charge
- Battery or charger contact is faulty
- Charger cavity contains conductive debris
- Battery charge or protection drops early
- Battery or tool contact is intermittent
- Lock-off, trigger, or wiring is faulty
- Blade bind or excess pressure overloads saw
- Motor or reciprocating drive has drag
- Dry chips obstruct lever travel
- Lever is forced against blade load
- Lever, cam, pin, or spring is damaged
- Front housing is impact-distorted
- Internal clamp mechanism is corroded
- Hot blade or pitch binds the shank
- Blade shank is bent inside clamp
- Chips are packed around the shank
- Clamp jaw or slider is damaged
- Blade was forced or installed crooked
- Sawdust or pitch obstructs shoe pivot
- Shoe is bent from impact or prying
- Pivot pin, spring, or retainer is worn
- Front housing or shoe mount is cracked
- Blade or clamp rubs the shoe
- Blade is dull, wrong, clogged, or reversed
- Battery is weak, hot, or nearly empty
- Blade is too long or poorly supported
- Work is loose or the kerf is pinching
- Motor, brush, or drive loses output
- Blade is dull, wrong, too long, or damaged
- Blade does not extend past work and shoe
- Shoe is not held firmly against work
- Feed is twisted, forced, or side-loaded
- Work support allows vibration or pinch
- Shoe is not held firmly on work
- Work is loose or the kerf closes
- Blade is dull, wrong, bent, or clogged
- Feed starts before full motor speed
- Hidden fastener or utility is struck
- Trigger does not return fully
- Battery or contact connection is unstable
- Brake switching path is worn or faulty
- Motor brushes or commutator are worn
- Motor or drive has an internal fault
- Blade is bent or not clamped securely
- Shoe or clamp contacts the blade
- Slider, bearing, gear, or crank is worn
- Motor pinion or brushes are damaged
- Housing or front assembly is misaligned
- Blade is dull, binding, or being forced
- Vents are blocked by dust or chips
- Duty cycle or feed load is excessive
- Battery or charger is hot or damaged
- Motor, brushes, bearing, or drive drags
- Battery is cracked, swollen, leaking, or wet
- Charger cord, plug, or case is damaged
- Liquid entered electrical or motor areas
- Severe arcing, smoke, or burning is present
- Housing, shoe, clamp, or handle has failed
- Blade shank is wrong, bent, or burred
- Clamp slot contains chips or pitch
- Blade is not inserted from the front
- Clamp jaws or slider are worn
- Blade is too short for the planned cut
Modell som stöds
Relaterade modeller
Vanliga symtom
Visa detaljer
Visa detaljer
Visa detaljer
Visa detaljer
Visa detaljer
Visa detaljer
Visa detaljer
Visa detaljer
Visa detaljer
Visa detaljer
Visa detaljer
Visa detaljer
Visa detaljer
Visa detaljer
Visa detaljer
Visa detaljer
Visa detaljer
Visa detaljer
Felmoder
Sammanfattning
Sågen ger ingen bladslagrespons trots laddad battery och normal avtryckarfunktion.
Full repair guide includes
- Root Cause Analysis
- Required Tools
- Replacement Parts
- Step-by-step Repair Procedure
- Safety Precautions
- Verification Checklist
Sammanfattning
battery går inte att sätta i helt, låsa, behålla eller släppa normalt i sågen.
Full repair guide includes
- Root Cause Analysis
- Required Tools
- Replacement Parts
- Step-by-step Repair Procedure
- Safety Precautions
- Verification Checklist
Sammanfattning
Laddaren startar inte eller slutför inte laddning, eller laddarens gröna lampa beter sig inte normalt.
Full repair guide includes
- Root Cause Analysis
- Required Tools
- Replacement Parts
- Step-by-step Repair Procedure
- Safety Precautions
- Verification Checklist
Full repair guide includes
- Root Cause Analysis
- Required Tools
- Replacement Parts
- Step-by-step Repair Procedure
- Safety Precautions
- Verification Checklist
Sammanfattning
Ta bort battery och sluta använda kontrollerna.
Full repair guide includes
- Root Cause Analysis
- Required Tools
- Replacement Parts
- Step-by-step Repair Procedure
- Safety Precautions
- Verification Checklist
Sammanfattning
Den verktygsfria bladklämspaken öppnas eller stängs inte helt, vilket förhindrar bladbyte eller säker klämning.
Full repair guide includes
- Root Cause Analysis
- Required Tools
- Replacement Parts
- Step-by-step Repair Procedure
- Safety Precautions
- Verification Checklist
Sammanfattning
Klämspaken öppnas normalt, men det installerade bladet sitter fast i framklämman och släpper inte.
Full repair guide includes
- Root Cause Analysis
- Required Tools
- Replacement Parts
- Step-by-step Repair Procedure
- Safety Precautions
- Verification Checklist
Sammanfattning
Den svängbara skon är böjd, lös, går inte att svänga fritt eller sitter inte fast mot arbetsstycket.
Full repair guide includes
- Root Cause Analysis
- Required Tools
- Replacement Parts
- Step-by-step Repair Procedure
- Safety Precautions
- Verification Checklist
Sammanfattning
Sågen, battery eller laddare blir onormalt varm eller stängs av upprepade gånger efter uppvärmning
Full repair guide includes
- Root Cause Analysis
- Required Tools
- Replacement Parts
- Step-by-step Repair Procedure
- Safety Precautions
- Verification Checklist
Sammanfattning
Bladet vandrar från snittlinjen, flexar överdrivet, böjs eller går av under användning.
Full repair guide includes
- Root Cause Analysis
- Required Tools
- Replacement Parts
- Step-by-step Repair Procedure
- Safety Precautions
- Verification Checklist
Full repair guide includes
- Root Cause Analysis
- Required Tools
- Replacement Parts
- Step-by-step Repair Procedure
- Safety Precautions
- Verification Checklist
Sammanfattning
Efter att ha släppt avtryckaren fortsätter bladet att slå märkbart längre än normalt istället för att stanna snabbt.
Full repair guide includes
- Root Cause Analysis
- Required Tools
- Replacement Parts
- Step-by-step Repair Procedure
- Safety Precautions
- Verification Checklist
Full repair guide includes
- Root Cause Analysis
- Required Tools
- Replacement Parts
- Step-by-step Repair Procedure
- Safety Precautions
- Verification Checklist
Full repair guide includes
- Root Cause Analysis
- Required Tools
- Replacement Parts
- Step-by-step Repair Procedure
- Safety Precautions
- Verification Checklist
Sammanfattning
Omedelbara farliga tillstånd såsom rök, gnistor, vätskeläckage, svullnad, brännande lukt, exponerade delar eller sprucken struktur förekommer.
Full repair guide includes
- Root Cause Analysis
- Required Tools
- Replacement Parts
- Step-by-step Repair Procedure
- Safety Precautions
- Verification Checklist
Full repair guide includes
- Root Cause Analysis
- Required Tools
- Replacement Parts
- Step-by-step Repair Procedure
- Safety Precautions
- Verification Checklist
Sammanfattning
1. Ta omedelbart bort battery; sluta använda kontrollerna.
Full repair guide includes
- Root Cause Analysis
- Required Tools
- Replacement Parts
- Step-by-step Repair Procedure
- Safety Precautions
- Verification Checklist