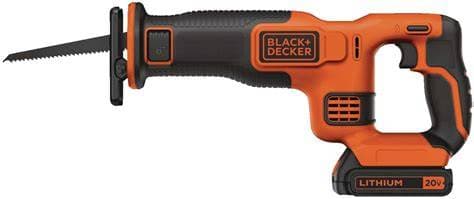

BLACK+DECKER BDCR20C Reparatiehandleiding
Reparatiehandleiding op eigenareniveau voor de BLACK+DECKER BDCR20C 20V MAX reciprozagen, inclusief probleemoplossing, onderdelenidentificatie, veiligheidsrichtlijnen en stapsgewijze reparatie-instructies.
$39.99
Laatst bijgewerkt Jul 31, 2026, 11:06 AM
Manual information
Over deze handleiding
Reparatiehandleiding op eigenareniveau voor de BLACK+DECKER BDCR20C 20V MAX reciprozagen, inclusief probleemoplossing, onderdelenidentificatie, veiligheidsrichtlijnen en stapsgewijze reparatie-instructies.
0% Reported Successful Repair
$39.99
Volledige handleiding bevat
- root cause analysis
- tools needed
- step-by-step repair procedure
- diagrams
- exploded views
- post-repair checks
Inhoudsopgave voorvertoning
- BLACK+DECKER BDCR20C 20V MAX* RECHTSAAG
- Black+decker Bdcr20c
- De zes belangrijkste zaken
- Wat dit model daadwerkelijk heeft
- Indicator- en signaalkaart
- Modelrevisie waarschuwing
- De kracht- en zaagroute
- Normale gebruiksvolgorde
- Normaal gedrag dat op een storing kan lijken
- Wat dit model niet heeft
- Veiligheid
- Kantel
- Structureel gevaar
- FM-04, FM-15, FM-16.
- Fm-13.
This preview shows only a portion of the complete repair manual. Purchase to access the full repair documentation, downloadable PDF and detailed repair procedures.
Waarschijnlijke grondoorzaken
- Battery is empty, protected, or faulty
- Pack is not latched or contacts are dirty
- Lock-off or trigger travel is incomplete
- Switch, wiring, or motor has failed
- Gear or reciprocating drive is seized
- Battery rails or socket contain debris
- Pack shell, rails, or handle is distorted
- Release button or latch is jammed
- Wrong or unverified battery is used
- Contact plate or housing is damaged
- Outlet has no power or is switched off
- Pack is not fully seated in charger
- Pack is too hot or too cold to charge
- Battery or charger contact is faulty
- Charger cavity contains conductive debris
- Battery charge or protection drops early
- Battery or tool contact is intermittent
- Lock-off, trigger, or wiring is faulty
- Blade bind or excess pressure overloads saw
- Motor or reciprocating drive has drag
- Dry chips obstruct lever travel
- Lever is forced against blade load
- Lever, cam, pin, or spring is damaged
- Front housing is impact-distorted
- Internal clamp mechanism is corroded
- Hot blade or pitch binds the shank
- Blade shank is bent inside clamp
- Chips are packed around the shank
- Clamp jaw or slider is damaged
- Blade was forced or installed crooked
- Sawdust or pitch obstructs shoe pivot
- Shoe is bent from impact or prying
- Pivot pin, spring, or retainer is worn
- Front housing or shoe mount is cracked
- Blade or clamp rubs the shoe
- Blade is dull, wrong, clogged, or reversed
- Battery is weak, hot, or nearly empty
- Blade is too long or poorly supported
- Work is loose or the kerf is pinching
- Motor, brush, or drive loses output
- Blade is dull, wrong, too long, or damaged
- Blade does not extend past work and shoe
- Shoe is not held firmly against work
- Feed is twisted, forced, or side-loaded
- Work support allows vibration or pinch
- Shoe is not held firmly on work
- Work is loose or the kerf closes
- Blade is dull, wrong, bent, or clogged
- Feed starts before full motor speed
- Hidden fastener or utility is struck
- Trigger does not return fully
- Battery or contact connection is unstable
- Brake switching path is worn or faulty
- Motor brushes or commutator are worn
- Motor or drive has an internal fault
- Blade is bent or not clamped securely
- Shoe or clamp contacts the blade
- Slider, bearing, gear, or crank is worn
- Motor pinion or brushes are damaged
- Housing or front assembly is misaligned
- Blade is dull, binding, or being forced
- Vents are blocked by dust or chips
- Duty cycle or feed load is excessive
- Battery or charger is hot or damaged
- Motor, brushes, bearing, or drive drags
- Battery is cracked, swollen, leaking, or wet
- Charger cord, plug, or case is damaged
- Liquid entered electrical or motor areas
- Severe arcing, smoke, or burning is present
- Housing, shoe, clamp, or handle has failed
- Blade shank is wrong, bent, or burred
- Clamp slot contains chips or pitch
- Blade is not inserted from the front
- Clamp jaws or slider are worn
- Blade is too short for the planned cut
Ondersteund model
Gerelateerde modellen
Veelvoorkomende symptomen
Details bekijken
Details bekijken
Details bekijken
Details bekijken
Details bekijken
Details bekijken
Details bekijken
Details bekijken
Details bekijken
Details bekijken
Details bekijken
Details bekijken
Details bekijken
Details bekijken
Details bekijken
Details bekijken
Details bekijken
Details bekijken
Storingsmodi
Samenvatting
De zaag geeft geen zaagbladslagreactie ondanks een opgeladen, vergrendelde battery en normale vergrendelings- en triggerwerking.
Full repair guide includes
- Root Cause Analysis
- Required Tools
- Replacement Parts
- Step-by-step Repair Procedure
- Safety Precautions
- Verification Checklist
Samenvatting
De battery kan niet volledig worden geplaatst, vergrendeld, vastgehouden of normaal worden losgelaten in de zaag.
Full repair guide includes
- Root Cause Analysis
- Required Tools
- Replacement Parts
- Step-by-step Repair Procedure
- Safety Precautions
- Verification Checklist
Full repair guide includes
- Root Cause Analysis
- Required Tools
- Replacement Parts
- Step-by-step Repair Procedure
- Safety Precautions
- Verification Checklist
Full repair guide includes
- Root Cause Analysis
- Required Tools
- Replacement Parts
- Step-by-step Repair Procedure
- Safety Precautions
- Verification Checklist
Samenvatting
Verwijder de battery en stop met het bedienen van de bedieningselementen.
Full repair guide includes
- Root Cause Analysis
- Required Tools
- Replacement Parts
- Step-by-step Repair Procedure
- Safety Precautions
- Verification Checklist
Samenvatting
De gereedschapsloze zaagklemhendel opent of sluit niet volledig, waardoor het wisselen van het zaagblad of het stevig klemmen wordt verhinderd.
Full repair guide includes
- Root Cause Analysis
- Required Tools
- Replacement Parts
- Step-by-step Repair Procedure
- Safety Precautions
- Verification Checklist
Samenvatting
De klemhendel opent normaal, maar het geïnstalleerde zaagblad blijft vastzitten en komt niet los van de voorste klem.
Full repair guide includes
- Root Cause Analysis
- Required Tools
- Replacement Parts
- Step-by-step Repair Procedure
- Safety Precautions
- Verification Checklist
Samenvatting
De kantelbare zool is verbogen, los, draait niet vrij of zit niet stevig tegen het werkstuk aan.
Full repair guide includes
- Root Cause Analysis
- Required Tools
- Replacement Parts
- Step-by-step Repair Procedure
- Safety Precautions
- Verification Checklist
Samenvatting
Het zaagblad beweegt gelijkmatig maar zaagt langzaam, hapert gemakkelijk of vereist overmatige druk.
Full repair guide includes
- Root Cause Analysis
- Required Tools
- Replacement Parts
- Step-by-step Repair Procedure
- Safety Precautions
- Verification Checklist
Samenvatting
Het zaagblad wijkt af van de zaaglijn, buigt te veel, buigt of breekt tijdens normaal zagen.
Full repair guide includes
- Root Cause Analysis
- Required Tools
- Replacement Parts
- Step-by-step Repair Procedure
- Safety Precautions
- Verification Checklist
Full repair guide includes
- Root Cause Analysis
- Required Tools
- Replacement Parts
- Step-by-step Repair Procedure
- Safety Precautions
- Verification Checklist
Samenvatting
Na het loslaten van de trigger blijft het zaagblad merkbaar langer dan normaal bewegen, wat aangeeft dat de elektrische rem het zaagblad niet snel stopt.
Full repair guide includes
- Root Cause Analysis
- Required Tools
- Replacement Parts
- Step-by-step Repair Procedure
- Safety Precautions
- Verification Checklist
Full repair guide includes
- Root Cause Analysis
- Required Tools
- Replacement Parts
- Step-by-step Repair Procedure
- Safety Precautions
- Verification Checklist
Samenvatting
Het gereedschap, battery of de lader wordt abnormaal heet of schakelt herhaaldelijk uit na opwarming.
Full repair guide includes
- Root Cause Analysis
- Required Tools
- Replacement Parts
- Step-by-step Repair Procedure
- Safety Precautions
- Verification Checklist
Samenvatting
Aanwezigheid van rook, vonken, vloeistoflekkage, zwelling, brandlucht, blootgestelde onderdelen of gebarsten structurele componenten die een onmiddellijk gevaar aangeven.
Full repair guide includes
- Root Cause Analysis
- Required Tools
- Replacement Parts
- Step-by-step Repair Procedure
- Safety Precautions
- Verification Checklist
Full repair guide includes
- Root Cause Analysis
- Required Tools
- Replacement Parts
- Step-by-step Repair Procedure
- Safety Precautions
- Verification Checklist
Samenvatting
1. Verwijder battery onmiddellijk; stop met het bedienen van de bedieningselementen.
Full repair guide includes
- Root Cause Analysis
- Required Tools
- Replacement Parts
- Step-by-step Repair Procedure
- Safety Precautions
- Verification Checklist