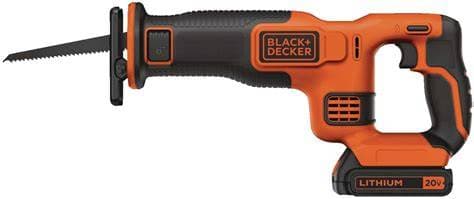

Руководство по ремонту BLACK+DECKER BDCR20C
Руководство по ремонту для владельцев электролобзика BLACK+DECKER BDCR20C 20V MAX, включая диагностику, идентификацию деталей, рекомендации по безопасности и пошаговые инструкции по ремонту.
$39.99
Обновлено Jul 31, 2026, 11:06 AM
Manual information
Об этом руководстве
Руководство по ремонту для владельцев электролобзика BLACK+DECKER BDCR20C 20V MAX, включая диагностику, идентификацию деталей, рекомендации по безопасности и пошаговые инструкции по ремонту.
0% Reported Successful Repair
$39.99
Полное руководство включает
- root cause analysis
- tools needed
- step-by-step repair procedure
- diagrams
- exploded views
- post-repair checks
Предпросмотр содержания
- BLACK+DECKER BDCR20C 20V MAX* САБЕЛЬНАЯ ПИЛА
- Black+decker Bdcr20c
- Шесть самых важных вещей
- Что действительно есть в этой модели
- Карта индикаторов и сигналов
- Предупреждение о ревизии модели
- Мощность и путь резки
- Последовательность нормального использования
- Нормальное поведение, которое может выглядеть как неисправность
- Чего нет в этой модели
- Безопасно
- Поворот
- Структурная опасность
- FM-04, FM-15, FM-16.
- Fm-13.
This preview shows only a portion of the complete repair manual. Purchase to access the full repair documentation, downloadable PDF and detailed repair procedures.
Вероятные причины
- Battery is empty, protected, or faulty
- Pack is not latched or contacts are dirty
- Lock-off or trigger travel is incomplete
- Switch, wiring, or motor has failed
- Gear or reciprocating drive is seized
- Battery rails or socket contain debris
- Pack shell, rails, or handle is distorted
- Release button or latch is jammed
- Wrong or unverified battery is used
- Contact plate or housing is damaged
- Outlet has no power or is switched off
- Pack is not fully seated in charger
- Pack is too hot or too cold to charge
- Battery or charger contact is faulty
- Charger cavity contains conductive debris
- Battery charge or protection drops early
- Battery or tool contact is intermittent
- Lock-off, trigger, or wiring is faulty
- Blade bind or excess pressure overloads saw
- Motor or reciprocating drive has drag
- Dry chips obstruct lever travel
- Lever is forced against blade load
- Lever, cam, pin, or spring is damaged
- Front housing is impact-distorted
- Internal clamp mechanism is corroded
- Hot blade or pitch binds the shank
- Blade shank is bent inside clamp
- Chips are packed around the shank
- Clamp jaw or slider is damaged
- Blade was forced or installed crooked
- Sawdust or pitch obstructs shoe pivot
- Shoe is bent from impact or prying
- Pivot pin, spring, or retainer is worn
- Front housing or shoe mount is cracked
- Blade or clamp rubs the shoe
- Blade is dull, wrong, clogged, or reversed
- Battery is weak, hot, or nearly empty
- Blade is too long or poorly supported
- Work is loose or the kerf is pinching
- Motor, brush, or drive loses output
- Blade is dull, wrong, too long, or damaged
- Blade does not extend past work and shoe
- Shoe is not held firmly against work
- Feed is twisted, forced, or side-loaded
- Work support allows vibration or pinch
- Shoe is not held firmly on work
- Work is loose or the kerf closes
- Blade is dull, wrong, bent, or clogged
- Feed starts before full motor speed
- Hidden fastener or utility is struck
- Trigger does not return fully
- Battery or contact connection is unstable
- Brake switching path is worn or faulty
- Motor brushes or commutator are worn
- Motor or drive has an internal fault
- Blade is bent or not clamped securely
- Shoe or clamp contacts the blade
- Slider, bearing, gear, or crank is worn
- Motor pinion or brushes are damaged
- Housing or front assembly is misaligned
- Blade is dull, binding, or being forced
- Vents are blocked by dust or chips
- Duty cycle or feed load is excessive
- Battery or charger is hot or damaged
- Motor, brushes, bearing, or drive drags
- Battery is cracked, swollen, leaking, or wet
- Charger cord, plug, or case is damaged
- Liquid entered electrical or motor areas
- Severe arcing, smoke, or burning is present
- Housing, shoe, clamp, or handle has failed
- Blade shank is wrong, bent, or burred
- Clamp slot contains chips or pitch
- Blade is not inserted from the front
- Clamp jaws or slider are worn
- Blade is too short for the planned cut
Поддерживаемая модель
Связанные модели
Распространённые симптомы
Подробнее
Подробнее
Подробнее
Подробнее
Подробнее
Подробнее
Подробнее
Подробнее
Подробнее
Подробнее
Подробнее
Подробнее
Подробнее
Подробнее
Подробнее
Подробнее
Подробнее
Подробнее
Режимы неисправностей
Краткое описание
Пила не реагирует ходом полотна, несмотря на заряженный, зафиксированный battery и нормальную работу блокировки и курка.
Full repair guide includes
- Root Cause Analysis
- Required Tools
- Replacement Parts
- Step-by-step Repair Procedure
- Safety Precautions
- Verification Checklist
Краткое описание
battery не вставляется полностью, не фиксируется, не удерживается или не освобождается нормально в пиле.
Full repair guide includes
- Root Cause Analysis
- Required Tools
- Replacement Parts
- Step-by-step Repair Procedure
- Safety Precautions
- Verification Checklist
Full repair guide includes
- Root Cause Analysis
- Required Tools
- Replacement Parts
- Step-by-step Repair Procedure
- Safety Precautions
- Verification Checklist
Full repair guide includes
- Root Cause Analysis
- Required Tools
- Replacement Parts
- Step-by-step Repair Procedure
- Safety Precautions
- Verification Checklist
Краткое описание
Снимите battery и прекратите переключать органы управления.
Full repair guide includes
- Root Cause Analysis
- Required Tools
- Replacement Parts
- Step-by-step Repair Procedure
- Safety Precautions
- Verification Checklist
Краткое описание
Рычаг безинструментального зажима лезвия не открывается или не закрывается полностью, что препятствует замене лезвия или надежному зажиму.
Full repair guide includes
- Root Cause Analysis
- Required Tools
- Replacement Parts
- Step-by-step Repair Procedure
- Safety Precautions
- Verification Checklist
Краткое описание
Рычаг зажима открывается нормально, но установленное полотно остаётся зажатым и не выходит из переднего зажима.
Full repair guide includes
- Root Cause Analysis
- Required Tools
- Replacement Parts
- Step-by-step Repair Procedure
- Safety Precautions
- Verification Checklist
Краткое описание
Поворотная подошва деформирована, ослаблена, не поворачивается свободно или не плотно прилегает к заготовке.
Full repair guide includes
- Root Cause Analysis
- Required Tools
- Replacement Parts
- Step-by-step Repair Procedure
- Safety Precautions
- Verification Checklist
Краткое описание
Полотно ходит равномерно, но режет медленно, легко заедает или требует чрезмерного усилия подачи.
Full repair guide includes
- Root Cause Analysis
- Required Tools
- Replacement Parts
- Step-by-step Repair Procedure
- Safety Precautions
- Verification Checklist
Краткое описание
Полотно отклоняется от линии реза, чрезмерно гнётся, изгибается или ломается при нормальной резке.
Full repair guide includes
- Root Cause Analysis
- Required Tools
- Replacement Parts
- Step-by-step Repair Procedure
- Safety Precautions
- Verification Checklist
Full repair guide includes
- Root Cause Analysis
- Required Tools
- Replacement Parts
- Step-by-step Repair Procedure
- Safety Precautions
- Verification Checklist
Краткое описание
После отпускания курка полотно продолжает ходить заметно дольше обычного, что указывает на неисправность электрического тормоза.
Full repair guide includes
- Root Cause Analysis
- Required Tools
- Replacement Parts
- Step-by-step Repair Procedure
- Safety Precautions
- Verification Checklist
Full repair guide includes
- Root Cause Analysis
- Required Tools
- Replacement Parts
- Step-by-step Repair Procedure
- Safety Precautions
- Verification Checklist
Краткое описание
Инструмент, battery или зарядное устройство становятся аномально горячими или многократно отключаются после нагрева.
Full repair guide includes
- Root Cause Analysis
- Required Tools
- Replacement Parts
- Step-by-step Repair Procedure
- Safety Precautions
- Verification Checklist
Краткое описание
Наличие дыма, искр, протечек жидкости, вздутия, запаха горения, оголённых частей или трещин в конструктивных элементах, указывающих на немедленную опасность.
Full repair guide includes
- Root Cause Analysis
- Required Tools
- Replacement Parts
- Step-by-step Repair Procedure
- Safety Precautions
- Verification Checklist
Full repair guide includes
- Root Cause Analysis
- Required Tools
- Replacement Parts
- Step-by-step Repair Procedure
- Safety Precautions
- Verification Checklist
Краткое описание
1. Немедленно снимите battery; прекратите переключать органы управления.
Full repair guide includes
- Root Cause Analysis
- Required Tools
- Replacement Parts
- Step-by-step Repair Procedure
- Safety Precautions
- Verification Checklist