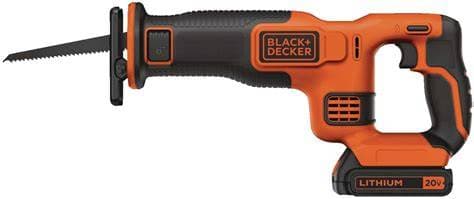

BLACK+DECKER BDCR20C Onarım Kılavuzu
BLACK+DECKER BDCR20C 20V MAX testere için kullanıcı düzeyinde tamir kılavuzu; sorun giderme, parça tanımlama, güvenlik rehberi ve adım adım tamir talimatları içerir.
$39.99
Son güncelleme Jul 31, 2026, 11:06 AM
Manual information
Bu kılavuz hakkında
BLACK+DECKER BDCR20C 20V MAX testere için kullanıcı düzeyinde tamir kılavuzu; sorun giderme, parça tanımlama, güvenlik rehberi ve adım adım tamir talimatları içerir.
0% Reported Successful Repair
$39.99
Tam Kılavuz Şunları İçerir
- root cause analysis
- tools needed
- step-by-step repair procedure
- diagrams
- exploded views
- post-repair checks
İçindekiler önizlemesi
- BLACK+DECKER BDCR20C 20V MAKS* KOLLU TESTERE
- Black+decker Bdcr20c
- En Önemli Altı Şey
- Bu Modelin Gerçek Özellikleri
- Gösterge ve Sinyal Haritası
- Model Revizyon Uyarısı
- Güç ve Kesme Yolu
- Normal Kullanım Sırası
- Arıza Gibi Görünebilen Normal Davranış
- Bu Modelde Olmayanlar
- Güvenli Kullanım
- Pivot
- Yapısal Tehlike
- FM-04, FM-15, FM-16.
- Fm-13.
This preview shows only a portion of the complete repair manual. Purchase to access the full repair documentation, downloadable PDF and detailed repair procedures.
Olası Kök Nedenler
- Battery is empty, protected, or faulty
- Pack is not latched or contacts are dirty
- Lock-off or trigger travel is incomplete
- Switch, wiring, or motor has failed
- Gear or reciprocating drive is seized
- Battery rails or socket contain debris
- Pack shell, rails, or handle is distorted
- Release button or latch is jammed
- Wrong or unverified battery is used
- Contact plate or housing is damaged
- Outlet has no power or is switched off
- Pack is not fully seated in charger
- Pack is too hot or too cold to charge
- Battery or charger contact is faulty
- Charger cavity contains conductive debris
- Battery charge or protection drops early
- Battery or tool contact is intermittent
- Lock-off, trigger, or wiring is faulty
- Blade bind or excess pressure overloads saw
- Motor or reciprocating drive has drag
- Dry chips obstruct lever travel
- Lever is forced against blade load
- Lever, cam, pin, or spring is damaged
- Front housing is impact-distorted
- Internal clamp mechanism is corroded
- Hot blade or pitch binds the shank
- Blade shank is bent inside clamp
- Chips are packed around the shank
- Clamp jaw or slider is damaged
- Blade was forced or installed crooked
- Sawdust or pitch obstructs shoe pivot
- Shoe is bent from impact or prying
- Pivot pin, spring, or retainer is worn
- Front housing or shoe mount is cracked
- Blade or clamp rubs the shoe
- Blade is dull, wrong, clogged, or reversed
- Battery is weak, hot, or nearly empty
- Blade is too long or poorly supported
- Work is loose or the kerf is pinching
- Motor, brush, or drive loses output
- Blade is dull, wrong, too long, or damaged
- Blade does not extend past work and shoe
- Shoe is not held firmly against work
- Feed is twisted, forced, or side-loaded
- Work support allows vibration or pinch
- Shoe is not held firmly on work
- Work is loose or the kerf closes
- Blade is dull, wrong, bent, or clogged
- Feed starts before full motor speed
- Hidden fastener or utility is struck
- Trigger does not return fully
- Battery or contact connection is unstable
- Brake switching path is worn or faulty
- Motor brushes or commutator are worn
- Motor or drive has an internal fault
- Blade is bent or not clamped securely
- Shoe or clamp contacts the blade
- Slider, bearing, gear, or crank is worn
- Motor pinion or brushes are damaged
- Housing or front assembly is misaligned
- Blade is dull, binding, or being forced
- Vents are blocked by dust or chips
- Duty cycle or feed load is excessive
- Battery or charger is hot or damaged
- Motor, brushes, bearing, or drive drags
- Battery is cracked, swollen, leaking, or wet
- Charger cord, plug, or case is damaged
- Liquid entered electrical or motor areas
- Severe arcing, smoke, or burning is present
- Housing, shoe, clamp, or handle has failed
- Blade shank is wrong, bent, or burred
- Clamp slot contains chips or pitch
- Blade is not inserted from the front
- Clamp jaws or slider are worn
- Blade is too short for the planned cut
Desteklenen model
İlgili Modeller
Yaygın belirtiler
Ayrıntıları görüntüle
Arıza Modları
Özet
Şarjlı, kilitlenmiş battery ve normal kilit ve tetik çalışmasına rağmen testere bıçak vuruşuna tepki vermiyor.
Full repair guide includes
- Root Cause Analysis
- Required Tools
- Replacement Parts
- Step-by-step Repair Procedure
- Safety Precautions
- Verification Checklist
Özet
battery testereye tam oturmuyor, kilitlenmiyor, tutulmuyor veya normal şekilde serbest bırakılmıyor.
Full repair guide includes
- Root Cause Analysis
- Required Tools
- Replacement Parts
- Step-by-step Repair Procedure
- Safety Precautions
- Verification Checklist
Full repair guide includes
- Root Cause Analysis
- Required Tools
- Replacement Parts
- Step-by-step Repair Procedure
- Safety Precautions
- Verification Checklist
Full repair guide includes
- Root Cause Analysis
- Required Tools
- Replacement Parts
- Step-by-step Repair Procedure
- Safety Precautions
- Verification Checklist
Özet
battery çıkarın ve kontrolleri döndürmeyi durdurun.
Full repair guide includes
- Root Cause Analysis
- Required Tools
- Replacement Parts
- Step-by-step Repair Procedure
- Safety Precautions
- Verification Checklist
Özet
Aletsiz bıçak kelepçesi kolu tam açılmıyor veya kapanmıyor, bu da bıçak değişimini veya güvenli kelepçelemeyi engelliyor.
Full repair guide includes
- Root Cause Analysis
- Required Tools
- Replacement Parts
- Step-by-step Repair Procedure
- Safety Precautions
- Verification Checklist
Özet
Kelepçe kolu normal açılıyor ancak takılı bıçak ön kelepçeden çıkmıyor.
Full repair guide includes
- Root Cause Analysis
- Required Tools
- Replacement Parts
- Step-by-step Repair Procedure
- Safety Precautions
- Verification Checklist
Özet
Döner ayakkabı eğilmiş, gevşek, serbestçe dönmüyor veya iş parçasına sağlam oturmuyor.
Full repair guide includes
- Root Cause Analysis
- Required Tools
- Replacement Parts
- Step-by-step Repair Procedure
- Safety Precautions
- Verification Checklist
Özet
Bıçak düzenli vuruş yapıyor ancak yavaş kesiyor, kolayca duruyor veya aşırı besleme kuvveti gerektiriyor.
Full repair guide includes
- Root Cause Analysis
- Required Tools
- Replacement Parts
- Step-by-step Repair Procedure
- Safety Precautions
- Verification Checklist
Özet
Bıçak, normal kesim sırasında kesim çizgisinden sapıyor, aşırı esniyor, eğiliyor veya kırılıyor.
Full repair guide includes
- Root Cause Analysis
- Required Tools
- Replacement Parts
- Step-by-step Repair Procedure
- Safety Precautions
- Verification Checklist
Full repair guide includes
- Root Cause Analysis
- Required Tools
- Replacement Parts
- Step-by-step Repair Procedure
- Safety Precautions
- Verification Checklist
Özet
Tetik bırakıldıktan sonra bıçak normalden belirgin şekilde daha uzun vuruş yapmaya devam ediyor; bu, elektrikli frenin bıçağı zamanında durdurmadığını gösterir.
Full repair guide includes
- Root Cause Analysis
- Required Tools
- Replacement Parts
- Step-by-step Repair Procedure
- Safety Precautions
- Verification Checklist
Full repair guide includes
- Root Cause Analysis
- Required Tools
- Replacement Parts
- Step-by-step Repair Procedure
- Safety Precautions
- Verification Checklist
Özet
Alet, battery veya şarj cihazı anormal şekilde ısınıyor veya ısındıktan sonra tekrar tekrar kapanıyor.
Full repair guide includes
- Root Cause Analysis
- Required Tools
- Replacement Parts
- Step-by-step Repair Procedure
- Safety Precautions
- Verification Checklist
Özet
Duman, kıvılcım, sıvı sızıntısı, şişme, yanık koku, açıkta parçalar veya çatlak yapısal bileşenler gibi acil tehlike belirtileri.
Full repair guide includes
- Root Cause Analysis
- Required Tools
- Replacement Parts
- Step-by-step Repair Procedure
- Safety Precautions
- Verification Checklist
Full repair guide includes
- Root Cause Analysis
- Required Tools
- Replacement Parts
- Step-by-step Repair Procedure
- Safety Precautions
- Verification Checklist
Özet
1. Hemen battery çıkarın; kontrolleri döngülemeyi durdurun.
Full repair guide includes
- Root Cause Analysis
- Required Tools
- Replacement Parts
- Step-by-step Repair Procedure
- Safety Precautions
- Verification Checklist