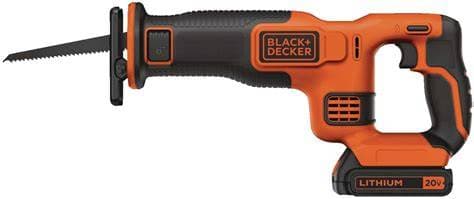

Instrukcja naprawy BLACK+DECKER BDCR20C
Kompleksowy przewodnik naprawczy dla wyrzynarki oscylacyjnej BLACK+DECKER BDCR20C 20V MAX. Zawiera rozwiązywanie problemów, identyfikację części, porady dotyczące bezpieczeństwa oraz instrukcje naprawy DIY dla 16 typowych trybów awarii.
$39.99
Ostatnio zaktualizowano Jul 31, 2026, 11:06 AM
Manual information
O tej instrukcji
Kompleksowy przewodnik naprawczy dla wyrzynarki oscylacyjnej BLACK+DECKER BDCR20C 20V MAX. Zawiera rozwiązywanie problemów, identyfikację części, porady dotyczące bezpieczeństwa oraz instrukcje naprawy DIY dla 16 typowych trybów awarii.
0% Reported Successful Repair
$39.99
Pełna instrukcja zawiera
- root cause analysis
- tools needed
- step-by-step repair procedure
- diagrams
- exploded views
- post-repair checks
Podgląd spisu treści
- PIŁA SZABLASTA BLACK+DECKER BDCR20C 20V MAX*
- Black+decker Bdcr20c
- Sześć najważniejszych rzeczy
- Co faktycznie ma ten model
- Mapa wskaźników i sygnałów
- Ostrzeżenie dotyczące rewizji modelu
- Moc i ścieżka cięcia
- Normalna sekwencja użycia
- Normalne zachowanie, które może wyglądać jak usterka
- Czego ten model nie ma
- Bezpiecznie
- Obrót
- Zagrożenie strukturalne
- FM-04, FM-15, FM-16.
- Fm-13.
This preview shows only a portion of the complete repair manual. Purchase to access the full repair documentation, downloadable PDF and detailed repair procedures.
Prawdopodobne przyczyny
- Battery is empty, protected, or faulty
- Pack is not latched or contacts are dirty
- Lock-off or trigger travel is incomplete
- Switch, wiring, or motor has failed
- Gear or reciprocating drive is seized
- Battery rails or socket contain debris
- Pack shell, rails, or handle is distorted
- Release button or latch is jammed
- Wrong or unverified battery is used
- Contact plate or housing is damaged
- Outlet has no power or is switched off
- Pack is not fully seated in charger
- Pack is too hot or too cold to charge
- Battery or charger contact is faulty
- Charger cavity contains conductive debris
- Battery charge or protection drops early
- Battery or tool contact is intermittent
- Lock-off, trigger, or wiring is faulty
- Blade bind or excess pressure overloads saw
- Motor or reciprocating drive has drag
- Dry chips obstruct lever travel
- Lever is forced against blade load
- Lever, cam, pin, or spring is damaged
- Front housing is impact-distorted
- Internal clamp mechanism is corroded
- Hot blade or pitch binds the shank
- Blade shank is bent inside clamp
- Chips are packed around the shank
- Clamp jaw or slider is damaged
- Blade was forced or installed crooked
- Sawdust or pitch obstructs shoe pivot
- Shoe is bent from impact or prying
- Pivot pin, spring, or retainer is worn
- Front housing or shoe mount is cracked
- Blade or clamp rubs the shoe
- Blade is dull, wrong, clogged, or reversed
- Battery is weak, hot, or nearly empty
- Blade is too long or poorly supported
- Work is loose or the kerf is pinching
- Motor, brush, or drive loses output
- Blade is dull, wrong, too long, or damaged
- Blade does not extend past work and shoe
- Shoe is not held firmly against work
- Feed is twisted, forced, or side-loaded
- Work support allows vibration or pinch
- Shoe is not held firmly on work
- Work is loose or the kerf closes
- Blade is dull, wrong, bent, or clogged
- Feed starts before full motor speed
- Hidden fastener or utility is struck
- Trigger does not return fully
- Battery or contact connection is unstable
- Brake switching path is worn or faulty
- Motor brushes or commutator are worn
- Motor or drive has an internal fault
- Blade is bent or not clamped securely
- Shoe or clamp contacts the blade
- Slider, bearing, gear, or crank is worn
- Motor pinion or brushes are damaged
- Housing or front assembly is misaligned
- Blade is dull, binding, or being forced
- Vents are blocked by dust or chips
- Duty cycle or feed load is excessive
- Battery or charger is hot or damaged
- Motor, brushes, bearing, or drive drags
- Battery is cracked, swollen, leaking, or wet
- Charger cord, plug, or case is damaged
- Liquid entered electrical or motor areas
- Severe arcing, smoke, or burning is present
- Housing, shoe, clamp, or handle has failed
- Blade shank is wrong, bent, or burred
- Clamp slot contains chips or pitch
- Blade is not inserted from the front
- Clamp jaws or slider are worn
- Blade is too short for the planned cut
Obsługiwany model
Powiązane modele
Typowe objawy
Zobacz szczegóły
Zobacz szczegóły
Zobacz szczegóły
Zobacz szczegóły
Zobacz szczegóły
Zobacz szczegóły
Zobacz szczegóły
Zobacz szczegóły
Zobacz szczegóły
Zobacz szczegóły
Zobacz szczegóły
Zobacz szczegóły
Zobacz szczegóły
Zobacz szczegóły
Zobacz szczegóły
Zobacz szczegóły
Zobacz szczegóły
Zobacz szczegóły
Tryby awarii
Podsumowanie
Wyrzynarka nie reaguje ruchem ostrza pomimo naładowanego battery i normalnej pracy spustu.
Full repair guide includes
- Root Cause Analysis
- Required Tools
- Replacement Parts
- Step-by-step Repair Procedure
- Safety Precautions
- Verification Checklist
Podsumowanie
battery nie wchodzi całkowicie, nie zatrzaskuje się, nie pozostaje na miejscu lub nie zwalnia normalnie w wyrzynarce.
Full repair guide includes
- Root Cause Analysis
- Required Tools
- Replacement Parts
- Step-by-step Repair Procedure
- Safety Precautions
- Verification Checklist
Podsumowanie
Ładowarka nie rozpoczyna lub nie kończy ładowania, lub zielona kontrolka ładowarki nie działa prawidłowo.
Full repair guide includes
- Root Cause Analysis
- Required Tools
- Replacement Parts
- Step-by-step Repair Procedure
- Safety Precautions
- Verification Checklist
Full repair guide includes
- Root Cause Analysis
- Required Tools
- Replacement Parts
- Step-by-step Repair Procedure
- Safety Precautions
- Verification Checklist
Podsumowanie
Usuń battery i przestań używać sterowania.
Full repair guide includes
- Root Cause Analysis
- Required Tools
- Replacement Parts
- Step-by-step Repair Procedure
- Safety Precautions
- Verification Checklist
Podsumowanie
Dźwignia beznarzędziowego zacisku ostrza nie otwiera się ani nie zamyka całkowicie, uniemożliwiając wymianę ostrza lub jego pewne zaciskanie.
Full repair guide includes
- Root Cause Analysis
- Required Tools
- Replacement Parts
- Step-by-step Repair Procedure
- Safety Precautions
- Verification Checklist
Podsumowanie
Dźwignia zacisku otwiera się normalnie, ale zamontowane ostrze pozostaje uwięzione w przednim zacisku i nie zwalnia się.
Full repair guide includes
- Root Cause Analysis
- Required Tools
- Replacement Parts
- Step-by-step Repair Procedure
- Safety Precautions
- Verification Checklist
Podsumowanie
Obrotowa stopa jest wygięta, luźna, nie obraca się swobodnie lub nie przylega mocno do materiału.
Full repair guide includes
- Root Cause Analysis
- Required Tools
- Replacement Parts
- Step-by-step Repair Procedure
- Safety Precautions
- Verification Checklist
Podsumowanie
Piła, battery lub ładowarka nagrzewa się nadmiernie lub wielokrotnie wyłącza po rozgrzaniu
Full repair guide includes
- Root Cause Analysis
- Required Tools
- Replacement Parts
- Step-by-step Repair Procedure
- Safety Precautions
- Verification Checklist
Podsumowanie
Ostrze zbacza z linii cięcia, nadmiernie się wygina, wygina lub łamie podczas użytkowania.
Full repair guide includes
- Root Cause Analysis
- Required Tools
- Replacement Parts
- Step-by-step Repair Procedure
- Safety Precautions
- Verification Checklist
Full repair guide includes
- Root Cause Analysis
- Required Tools
- Replacement Parts
- Step-by-step Repair Procedure
- Safety Precautions
- Verification Checklist
Podsumowanie
Po zwolnieniu spustu ostrze kontynuuje ruch znacznie dłużej niż normalnie zamiast zatrzymać się natychmiast.
Full repair guide includes
- Root Cause Analysis
- Required Tools
- Replacement Parts
- Step-by-step Repair Procedure
- Safety Precautions
- Verification Checklist
Full repair guide includes
- Root Cause Analysis
- Required Tools
- Replacement Parts
- Step-by-step Repair Procedure
- Safety Precautions
- Verification Checklist
Full repair guide includes
- Root Cause Analysis
- Required Tools
- Replacement Parts
- Step-by-step Repair Procedure
- Safety Precautions
- Verification Checklist
Podsumowanie
Występują natychmiastowe zagrożenia, takie jak dym, iskry, wyciek cieczy, puchnięcie, zapach spalenizny, odsłonięte części lub pęknięcia strukturalne.
Full repair guide includes
- Root Cause Analysis
- Required Tools
- Replacement Parts
- Step-by-step Repair Procedure
- Safety Precautions
- Verification Checklist
Full repair guide includes
- Root Cause Analysis
- Required Tools
- Replacement Parts
- Step-by-step Repair Procedure
- Safety Precautions
- Verification Checklist
Podsumowanie
1. Natychmiast usuń battery; przestań używać sterowania.
Full repair guide includes
- Root Cause Analysis
- Required Tools
- Replacement Parts
- Step-by-step Repair Procedure
- Safety Precautions
- Verification Checklist